Thursday, April 3, 2014

ABC - Another BAD Creation by @LovingYourHair

Can you say pretty? I can and it is pronounced Teyonah Parris. Last night at the Mad Men Season 7 premier party, Teyonah Parris looked gorgeous from head to toe. Her hair was in a fabulous updo by Felicia Leatherwood, aka @lovingyourhair on Instagram. Felicia described it as combination of "puff twist meets curls with a kriss cross Updo in the back." Whatever it was, it looked fabulous. Here are some photos:


Image via Instagram/@lovingyourhair

And the whole look was beautiful:


Image via Instagram/@teyonahparris
And:


Image via Instagram/@teyonahparris
 I am a huge fan of the show, and I'm glad to see that Teyonah is taking part in Season 7. I wonder if her character will rock an Afro this year, or stick with the wigs/press-n-curls that she's worn for the past year or two. I'm hoping that she has a new look, and a larger part this season, but we'll see on April 13th when the show premiers on AMC!

Today's Hair - 4/3

This is me pretty much in real time...


My hair is in two wet flat-twists right now. I washed and conditioned my hair, oiled it, use various leave-ins and am trying Karen's Body Beautiful as my sealant. But I'm trying to decide what to do next. 

Should I let my hair dry like this and do a big twist-out for tomorrow, or think of this as a style to stretch my hair, and twist it tonight? I can't decide - but I will keep you posted.

Fitness Post: Abtastic April!

I'm in a monthly workout challenge group. Last month the challenge was push-ups. I started with 21 on March 1st and ended up doing 51 on March 31st. I didn't skip any days, and I didn't cheat. It felt great, and the best feeling was the day that I did 40 push-ups in a row without stopping. ME! I did that....

This month's challenge, if you couldn't tell from the title, is all about building our abdominal muscles. We've been tasked with adding some sort of abdominal exercise to our usual routine. One of the favorite routines of the people in my group is this one, known as "Abs on Fire". Now I've tried it, but I've never done the recommended 3 sets of 20. In fact, I've just gotten to the point where I might actually be able to do the "Cycling Russian Twists" - but I'm not at the point where I can do 60 of them.


I'm going to incorporate these into my month, but I'm also trying to add ab work into my current morning routine for my glutes. Instead of just doing sumo squats, now I'm doing sumo squats into steam engines (or a standing Russian twist). I've also added an ab pulse to one of my other favorite exercises, the mule kick and fire hydrant. In that way I can get in 100 ab exercises without much extra time or effort.

I'm not really focusing on getting a six-pack (Rectus Abdominis), or my obliques (internal or external) because we do a lot of ab work at the boxing gym, and it is generally focused on those parts of the abdominals. Call it vanity, but I am much more interested in making my waist look as slim as possible. The Transverse Abdominis, the muscles that act as a corset around our mid-sections, are the key to looking like a slimmy trimmy. 

To that end I'm going to make the plank, and it's many variations, the focus of my routine at least four (4) days a week. I've been doing timed planks and Spider-Man planks, where you lift your leg  and bend it at the knee (like a dog to a fire hydrant) and try to touch the bent knee to the elbow. I'm trying to build up to doing 25 on each side. Planks with leg lifts, planks with step outs to each side, and planks with knees to the opposite elbow are also making their way into the rotation.

For a well rounded ab workout check out the following Instagram video by @_getfitbysmith_ - follow him for amazing videos and photos:


And don't forget that food intake impacts the ability to see abs as much as, if not more than, targeted ab exercises. 
Tuesday, April 1, 2014

My Hair Last Week - Somewhat Inspired

So I posted this pic early last week and called it hair inspiration:


I was inspired. Not to try the exact style because I knew that I wouldn't wear it out, so I made modifications. I actually pulled out my rollers twice over the past week. The first iteration included me putting my hair in a ponytail then rolling the ends for an imagined curly bun. It turned into a 70's bouffant/prom hair, but I liked it. I allowed the drop curls to be kind of stacked into my bun. Here are some photos:


Again, not photogenic, but you get the idea. 

Later I disturbed the curls a little and despite sweating it out I wore it like this:


I then decided to roll it all, although I used far fewer rollers than Ms. Dugas. I put it up in another bun. Here are the photos:


After the rollers, I had one more wave of inspiration - actually I just knew it was going to be another couple of bun days, so I changed it up a little by twisting all of the my ends into 5 large double-strand twists. I tucked them under and pinned them down. Here were the results:


The next day I undid the twists, pinned down the hair a little and did a little flat-twist bang.


Let me know what you think, and please forgive me for these photos. I'm going to start setting up my "real" camera, so I can put up decent photos on this blog....and if you would like to find a collection of easy (and cute) hairstyles, find my book, One Hairstyle, Thirty-one Ways, on Amazon.com. 

Thursday, March 27, 2014

What's the SPF of Your Favorite Oils and Butters? Plus Recipe

Image via babble.com


Considering the weather conditions around the country, this post may be a little too optimistic for most, but I figure it will give us enough time to be prepared for the upcoming warm weather or learn that we should start applying sunscreen now! Besides, the American Melanoma Founfation suggests that people wear sunscreen of at least (sun protection factor) SPF 15 every day if you are exposed to more than 20 minutes of sunshine a day. That would be most of us, since the commute to and from work usually includes some sun and plenty of time... Anyway, SPF is, as I wrote above the sun protection factor of the product, and the number attached means how much more time one can spend in the sun with the product as opposed to wearing nothing at all. So if you have on a product with SPF 2, you can stay in the sun twice as long with the product as you could/should have without the product. For more information on SPF, sunscreens, UVA and UVB exposure please go to http://www.melanomafoundation.org/prevention/facts.htm. 

You know that most of the recipes for skin and beauty products are based on the belief that the products, oils, gels and butters that are purchased to make hair products can be used to make other natural health and beauty aids. In this instance, upon doing some research, I've also learned that traditional sunscreens can also be harmful to our health because they often block the vital Vitamin D from being absorbed into our skin. Vitamin D is important in that its presence assists in the prevention of certain cancers. 

I got a little off topic, but I've included some of the most popular oils and butters below, then shared some of the real SPF powerhouses, so you can work them into your hair and skin routines, or use them as part of the sunscreen recipe I've included below.

Coconut Oil:  SPF 2-8

Olive Oil:  SPF 2-8

Shea butter:  SPF 3-6

Jojoba Oil:  SPF 4

Sweet almond Oil:  SPF 5

Avocado Oil:  SPF 4-15

Powerhouses of Natural SPF!

Carrot Seed Oil: SPF 38-40

Raspberry Seed Oil: SPF 28-50

Wheatgerm Oil: SPF 20

Source - livelovefruit.com
=============================

Powerhouse Sunscreen - as an oil or a body butter

Ingredients
1/4 cup coconut oil
1/4 cup shea butter (optional)
1/4 cup aloe vera gel (optional)
1/8 cup sesame or jojoba oil
2 tbsp. beeswax granules (optional)
1 tsp. red raspberry seed oil
20-30 drops carrot seed essential oil
Essential oils of your choice (but don't use citrus because it may cause a bad reaction when exposed to the sun)
Instructions for body butter
1. Using a double boiler (or your microwave), melt your coconut oil, sesame or jojoba oil, beeswax, and shea butter together. The beeswax will be the last to melt.
2. When the beeswax is melted, remove the mixture from the heat and let cool to room temperature.
3. Move the mixture to the fridge for 15-30 minutes. You want it to start to set up, but still be soft enough to whip.
4. Take the mixture out of the fridge and using a stand mixer or hand mixer, start to whip it. Drizzle in the red raspberry seed oil, the carrot seed oil, and any essential oils of your choice, and continue whipping until the mixture is light and fluffy.
6. Use as you would any regular sunscreen. Application rates will depend on your activity and exposure to water. Store in a glass container in the fridge between uses.
As an oil (do not use shea butter or beeswax)
1. Simply whip together all ingredients. Note that in warmer weather, this mix will likely liquefy. 
Recipe modified from healthimpactnews.com


Monday, March 24, 2014

Hair Inspiration - Flexirod Set by Aevin Dugas


I love drop curls whether you use flexirods, rollers or curl formers. I just  rarely think to do them because in my head they take a long time and I don't think they hold on loose natural hair (but I did feature them as a style in my book, One Hairstyle, Thirty-one Ways available on Amazon.com)...and the photo above proves me at least 1/2 wrong. And I need to remember that in my past attempts I did not try to set the hair with anything but water, and I think it needed more holding power than that - especially if done without heat.

I came across this photo of Ms. Aevin Dugas, Guiness Book of Records record holder for the world's largest Afro, saw that world of curls and am inspired to throw some rollers in my hair and see what happens. I know that I will likely end up with a curly puff, and not a whole head of flexirods.

I'll start with the steps I believe she used to create her look:

1. Dampen hair lightly with a leave-in conditioner and oil of your choice.

2. Section the hair into fairly small sections as you go - probably ending up with between 20 - 30 rollers (depending on the length and thickness of your hair).

3. For each section of lightly dampened hair, coat the strands with a gel or thick cream of your choice.

4. Roll each section of hair from root to tip in an upward motion - attempting to get continuous movement of the hair, so the layers of hair don't overlap on the rod.

5. Let the hair set until dry, or speed the process along by sitting under a dryer.

6. Dampen hands with oil to release the rods.

7. Remove the rods in the opposite direction from the way they were installed in order to maintain the curl. 

8. Gently split the curls until they reach the desired fullness. 
 
Remember you can do this style on loose natural hair, twists, locs, or braids. Try it out let me know how you like it, and if the steps are clear. And please check back to see my interpretation of the style.


Sunday, March 23, 2014

Smoothie Love: Springtime Strawberry

I make smoothies almost every day, and I've forced some of my co-workers into being a tasting committee. Actually I don't have to force them because we now have a game where they try to guess the ingredients for each smoothie - and they get free, albeit tiny, smoothies almost every day. Lately I've been having them give me grades, so that if I ever do a smoothie recipe book or start a smoothie blog, I'll have some idea of which of my smoothies actually taste good to other people!

Strawberry, Spinach and Lemon...as a salad!
Image via neighborfoodblog.com
My basic ground rules for my smoothies are that each one has at least 2 veggies, that they have no sweeteners other than fruit, and that they be dairy-free. I haven't tried any protein-focused smoothies or any veggie only smoothies - mostly because I don't find the idea of veggie smoothies appealing and because I haven't purchased any plant-based protein powders...but that may change. Who knows?

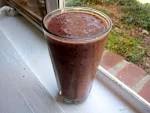
This smoothie received very high praise....I'm calling it Springtime Strawberry. Try it at home. The ingredients are as follows:


6-7 strawberries (I froze some that I purchased during the week and used those)
1/3 of a green apple
Springtime Strawberry Smoothie
Image via thymebombe.com 
7-8 baby carrots
6 red globe grapes, although 10-12 small red grapes will also do
a pinch of parsley (optional)
a handful of baby spinach
about a teaspoon of chia seeds (optional)
juice from 1 lemon

Put in spinach, then carrots, then strawberries, grapes, apple, parsley, chia seeds and lemon juice. Add about 1/2 cup of water, then blend.

It was DELICIOUS! Let me know if you agree.

Unknown food, recipe, Smoothie
Friday, March 21, 2014

Castor Oil for Eyebrows - My Own Personal Challenge...

My eyebrows at their struggly thinnest.
In an earlier post about Castor Oil (In This Corner: Jamaican Black vs. Cold Pressed Castor Oil) I mentioned some of the ways that Castor Oil can be used for hair growth and gave a recipe for a treatment that should significantly improve issue with thinning over the course of 6-8 weeks. I also shared a story about Castor Oil and its ability to grow hair in the aptly titiled post, Castor Oil Really Does Regrow Hair, and now I'm going to test it out on myself.


6th Grade

I'm trying to regrow my eyebrows because I have an affliction that some of us that are 30+ suffer - the skinny brow...A little back story. When I was younger my eyebrows were much, much thicker than they are now. (See above) I thought that they were fine and didn't think about them much until I went to college. There I started tweezing them a little bit so emphasize their arch, and to make myself feel like I was in style. At the time though, the style was really thin eyebrows. I didn't make the full commitment, but I did make my eyebrows thinner. To tell the truth though, it didn't matter much because I had a bang that went just past my eyebrows anyway. A little later, I got hit by a car and I had some facial scarring. One of those scars ended up going through my left eyebrow, and it created a gash. I couldn't take it, so I made my eyebrows thin enough so you couldn't see the effects of the scar. I then had stylishly thin eyebrows.

Now times have changed, and the thick eyebrow is the look du'jour. I spend a little time almost every day trying to pretend my eyebrows are thicker than they actually are - I use a brow pencil, mascara, or dark eyeliner and a brush (sometimes just one method, sometimes two or all three) to make my eyebrows more in the current style. I don't want to - it adds time to my mornings, and I'd like to guaranty that if I touch my face, that my eyebrows won't come off on my hands.

Goal
So although it may not be possible to return to my former full-figured eyebrows, I would like to make them a little thicker than they are now. More like the Lauryn Hill brows that I've shown in this post. To that end, I'm using:

a cotton swab
a mix of 3:1, Castor to Coconut Oil mix

I'll apply same every night before I go to sleep, and I'll let you know how it goes over the next month or two.


Sunday, March 16, 2014

Curlfriends: Tyesha!

Why did you decide to go natural?

I decided to go natural in 2002 because I realized there was no need for me to relax my hair. I only got my hair relaxed every 3-4 months. My new growth would easily straighten when blow dried and pressed and I had been wearing my hair in "big styles" such as twist and braid outs. It made no sense for me to process it. I transitioned with kinky twists and continuing the twist and braid outs. I eventually cut it to a teeny fro. 


What stage of life were you in when you went natural?

I was a freshman in college. I was away at Penn State in Altoona and decided to go natural on my Spring Break. 


What has been the best compliment you've received on your natural hair?

The best compliments I have received are from those family members who say I inspired them to go natural. Not all wear their hair in its natural state but many women in my family stopped relaxing their hair.


What is the one tip you would give a new natural? 

The one tip I would give a new natural is to learn your hair for yourself. There will be so many suggestions and tips and it can be overwhelming. What works for one may not work for you. It is all about trial and error.


Do you feel like you are part of the natural hair community?

On a wide scale, I do not feel I am a part of the natural community. I do follow many blogs and pages of naturals and those prominent in the natural hair community. However, locally, within my group of friends and family, I do feel I am. I am a go-to source for tips and styles.


Has your natural hair has influenced other parts of your life?

Being natural has influenced me mainly in helping me with my self confidence. I am often stopped and questioned or complimented on my hair. My family and friends are always excited to see  the new things I do new or the results of a new routine.  It makes me feel good to be able to share my journey and open up about who I am. 


What are your top three hair products or tools?  

 My top 3: 

- Raw shea butter 
- Olive oil
- Hair combs (the kind used for up dos)


What is your go-to style?

My go to style is a spur of the moment chunky twist out. I love twists in general because of the versatility they bring, like my favorite style of all, a curly mohawk.


If you would like to contact Tyesha, her information is provided below:

IG: acprincess16  & mizryd84
Twitter : acprincess16
YouTube: mizryd84 
Facebook Business Page: https://www.facebook.com/acphotography2012

Unknown
Thursday, March 13, 2014

Hairstyle: Today's Hair - 3/12


Early in the week I rocked two huge puffs, but yesterday I was ready for a change. I realized that I've never done a style with flat twisted or braided up sides (like a faux hawk), and I figured that yesterday was as good a time as any to try. 

After 40 minutes, a comb, and about 10 hair pins I ended up with this...


I kind of love it...and all that I imagine it can be. In its current state, I:

1) Parted the hair from about my temples to right behind the ear on each side of my head;

2) Formed four (4) flat twists in each section to just behind the ear, and twisted the hanging pieces to the end;

3) I repeated step 2 on the other side;

4) I pinned up the sides as I decided what to do with the rest of my hair;

5) I decided to do rows of large double-strand or two-strand twists. I ended up with 14 twists (4 rows of 3 twists and one row of 2 twists in the very back);

6) As I completed each row of twists, I took the ends of the twists and twirled them together into a single unit and tucked the unit under. I then pinned the unit in place (it was similar in technique to the non-braider's braid); and

7) Finally I unpinned the sides, and pulled the ends toward the middle of my head. I allowed the twists to criss-cross, then pinned down the ends. 

I'm planning several variations on this style - including roller-setting the twists and wearing it as a faux hawk. Later this should end up as a cute twistout as well (possibly with one side remaining twisted and the rest worn loose). 

Let me know what you think - and if you plan to try it.
Tuesday, March 11, 2014

Vitamin Challenge - What are the benefits of Prenatal Vitamins?

Image via curlydeviants.com
Remember that prenatal/fish oil challenge I started about a month ago? Well I've been taking my prenatals as my daily vitamins faithfully, and I'm seeing results. While my hair seems to have grown at its normal rate this month, it does seem stronger, and was surprisingly resilient after my dye experiment. My skin and nails have also seen some improvement - my skin seems healthier (less prone to pimples and definitely more radiant), my nails are stronger, and I feel more energized.

Typically prenatals contain: Vitamin A, D, E, C, Folic Acid, B1, B2, Niacin, B6, B12, Calcium, Iron, Zinc, Thiamin, Riboflavin, and WARNING - they may contain stool softeners that can cause cramping and diarrhea. These vitamins, retinoids and antioxidants are generally found in daily mutlti-vitamins, but often in different ratios. Some of the benefits are as follows: 


Vitamin A - this retinoid is good for our vision, our immune system (particularly by keeping our skin and mucous membranes healthy) and cell growth; 

Source: www.webmd.com/vitamins 

Vitamin D - its most important function is regulating the absorption of calcium and phosphorous, and facilitating normal immune system function in our bodies. It aids in the growth and development if our teeth and bones, and without sufficient amount they may develop abnormally. In addition Vitamin D aids in fighting certain diseases;
Source: www.healthline.com

Vitamin E - it is an antioxidant that helps boost immunity levels, and it is good for ones skin and hair. Vitamin E promotes the circulation of blood to the scalp and helps nourish the cells. It also speeds up cell regeneration and can help adults with such problems as wrinkles, scars and acne;

Source: www.newsmax.com

Vitamin C - it is another antioxidant. It's needed for the growth and repair of tissues in all parts of your body. It is used to form proteins that build skin, ligaments, blood vessels and tendons. It assists in healing tears to the skin (including the scalp) and maintaining ones bones, teeth and cartilage;

Source: www.nytimes.com

B Vitamins - as a group they include Thiamin (B1), Riboflavin (B2), Folate/Folic Acid (B9), Biotin (B7) and Niacin (B3) and help with cell metabolism (meaning that they speed up the growth cycle), work together to form healthy nerves, improve muscle function, and help prevent certain cancers and heart disease. 
  • B1 and B2 are important for healthy functioning of the muscles, nerves, and heart
  • B3 helps regulate the nervous and digestive systems
  • B5 and B12 are required for normal growth and development
  • B6 supports the immune system and aids the body in breaking down protein
  • B7 is involved in the production of hormones
  • B9 helps cells make and maintain DNA, and lowers the chances of birth defects and certain cancers; 
Sources: Dr. Oz show, altmedicine.about.com

Biotin - additionally, B7 is the hair powerhouse! Supplements have been found to be effective for healthy hair, shine, increased growth rate, reduced hair loss (alopecia). Biotin also promotes healthier looking skin and strong nails. If you are happy with your current multi-vitamin, but are interested in speeding the growth of your hair and nails - a biotin supplement may serve you as well or better than taking prenatals;

For the complete article see: http://m.voices.yahoo.com/a-biotin-hair-growth-supplement-benefits-more-than-9085243.html

Thiamin - B1, helps convert glucose into energy;

Riboflavin - B2, is important for skin health;

Source: www.stylecraze.com

Calcium - as everyone knows it is vital for the development of strong and healthy bones and teeth. And for the maintenance of those bones later on in life. Increasingly researchers are also finding that it helps with healthy weight loss, apparently higher levels of calcium help promote fat burn instead of fat storage;

Source: www.sheknows.com

Iron - without sufficient iron in the system, hair can and will become thin, dull, dry and prone to breakage and loss. Sufficient levels are essential to the nutrition and oxygenization of the hair's roots; and 

Source: www.stylecraze.com

Zinc - also provides hair health benefits. Insufficient zinc levels may result in loss of hair, hair that looks thin and dull and that goes grey early. There are also a number of shampoos which contain zinc to help prevent dandruff.

Source: Zinc.org

Go to any of the sources listed above to find out more about the benefits of each of these vitamins. I've got about 55 days to go. Please join me! Have you taken prenatals? Biotin supplements? What were your results?

And if you'd like to eat your way to better hair, read these two posts:

5 FANTASTIC Foods for Your Hair

and

Eating for a Healthy Scalp (& Hair)
Friday, March 7, 2014

This Smoothie is Perfect - Recipe for Hair or Hunger...

I've been making smoothies almost every day for the past six months now, and I've used all kinds of fruits, veggies, herbs and seeds in the mix. But I had been hesitant to use a fruit that I know and knew had tons of health benefits...the avocado.

When I went on my Middle Eastern Adventure I tried an avocado and banana smoothie and fell in love! It was creamy, rich and delicious. At home I've made this smoothie with variations (with ripe mango or strawberries and adding coconut milk, chia seeds and leafy greens) and its been delicious every time. And every time I drink it, I think - if I added honey, this would taste even better and BE THE BEST DEEP CONDITIONER ever!

So drink this smoothie or use this as a deep conditioner:

1/2 a ripe avocado
1 banana
1 tablespoon of honey
1/2 cup coconut milk (I use unsweetened Almond Breeze or Silk) 

Blend thoroughly....feel free to add strawberries or mango to the drinkable mix. 

As a deep conditioner, use it after shampooing, apply liberally to the hair, cover with a plastic cap for 30 minutes or 15 if using a steamer or other source of heat, and rinse thoroughly.   

Image via droz.com

Here are some links to other, avocado rich recipes (most for hair, one for food):

- DIY: Avocado Masque Recipe

- Recipe: Soften My Strands Hair Masque

- Recipe: Hydrating Hair Masque

- 5 FANTASTIC Fodds for Your Hair Plus Recipes
Wednesday, March 5, 2014

Update....Today's Hair 3/5

I've updated the style since my first post on this style. I took out the yaky hair and re-twisted the back to get a looser, fuller twist.  I pinned up the end of the ponytail, and I redid the bang as just a tucked under piece of loose hair that I pinned down. I still used the other half of the first ponytail to connect the back with the rest of the hair. Here are my results:

I really like it. And you can even sort of see the color in the last pic...I'm not opposed to trying the original style again (with kinkier extension hair), but I liked this for going into the office. I might try to do it as a more of a convertible style in the next go around. As in, with extension hair and a ponytail for the weekend, and tucked under for the weekdays. Click here for the original instructions and style. And remember, if you are looking for easy, cute and sophisticated styles - check out my book, One Hairstyle, Thirty-one Ways! Both editions are available on Amazon.com, and you can find the links from the home page.
Tuesday, March 4, 2014

Hair Inspiration - Today's Hair 3/4

I saw this look on Instagram and decided that it would be a cute, simple protective style to try. It looked like I could wear for a week or so, so it seemed like a winner. 

Source: Unknown but via Ladyinfluence on Instagram

I thought I would need:
3 or 4 elastic bands
4 hair clips
comb
brush
gel of choice
Bobby pins
Blow dryer
A bag of kanekolon or Marley extension hair

Am I the only woman around with bundles of hair at home? I went to my hair drawer to complete this look and found four different types of hair for extensions, and a wig. But no kanekolon or Marley hair, so I used the yaky hair that I had. Unfortunately, it was very straight and a 1b with cranberry highlights. I was feeling dubious, but I pushed ahead anyway.

Directions - as I imagined them:

1. Separate the hair into four sections, with the first section to become a bang. Clip each section until needed.

2. Lightly blow dry each of the three sections of hair that are to be ponytailed - if the hair has not been stretched previously. 

3. If it has been stretched, or after it's been blown out, comb the hair into 3 fairly tight ponytails using your gel of choice.

4. Lightly blow dry the front section of hair until it is fairly straight, and form a bang. 

5. Take the extension hair and incorporate it into the hair hanging from the ponytails. You should be forming a large two-strand twist that runs from the first ponytail to the end of the extension hair. 

The easiest way to incorporate the extension hair is to use it at its full length. Wrap the hair around the base of the first ponytail and use the two pieces of extension hair and one unit of your own hair to begin braiding. Do two or three rotations for a braid, then switch to a two strand twist that incorporates both your hair and the extension hair.

5. Be prepared to cut, burn or ponytail the ends of your two-strand twist. 

This style can be completed without extension hair, but you will likely have more fullness with the added hair.

Here are my results with the yaky hair:

I got really close to the original style - and I'm kind of proud of myself. I did end up using the straight yaky hair and I was right, I didn't love it. The texture and the color felt very different, a little too different, than my own. Also my blow dryer died while blowing out my second ponytail, so I had to revamp the style a little. I put all of my hair into 3 sections instead of 4. I split the first ponytail. I put half of the ends of my ponytail towards the back and added hair as described above. The other half I put forward and braided with yaky hair to form a braided bang. I swirled it up and pinned it down. I put the end of the two-strand twist into a ponytail holder and let it hang. Oh and I used straight aloe vera as my gel of choice.  

Overall - I wouldn't use this hair for this style again. If I had used hair with more texture, I wouldn't have felt the need to blow dry my own hair. In the future, I would also likely form a bang with one large twist pinned up instead of using so much extension hair.

I have an idea on some changes, so check back tomorrow for an update!  Here is the link to the new look

If you are looking for easy, cute and sophisticated styles - check out my book, One Hairstyle, Thirty-one Ways! Both editions are available on Amazon.com, and you can find the links from the home page.