


I will use the words braid/cornrow interchangeably.
Total Time: 3+ hours with breaks
Products used:
- Goody’s Ouchless bands
- Shea butter
- Clips (I had to use these on certain sections)
- Combs (regular – for parting and a wide-tooth comb)
- Start with clean, detangled hair
- I separated the hair into 5 sections. I secured each section with Goody’s Ouchless bands. There is one section on top, one section on each side and two more sections in the back.
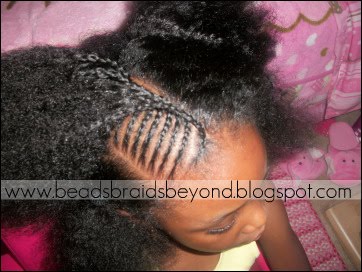
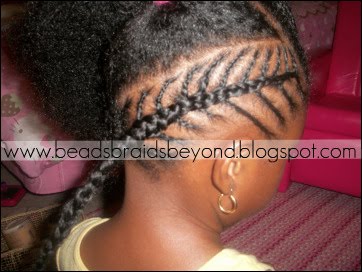
- I began with the top section. I separated the top section into 2 separate sections and began braiding. I made small parts because I wanted small braids. The braids are going towards the part that I made in the middle of the top section. Oh I should add that I used shea butter while braiding her hair.
- When I finished that part of her hair I began on the other side of the top section. Once again the braids were going towards the part that I made in the middle of that section. I made sure to line the braids up with the other braids that I previously did. I ended up with 24 braids in all in the top section.
- I did not braid the hair together on top yet because I needed the hair out of the way. I secured the braids with an ouchless band until I was ready.
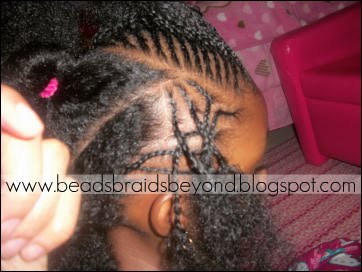
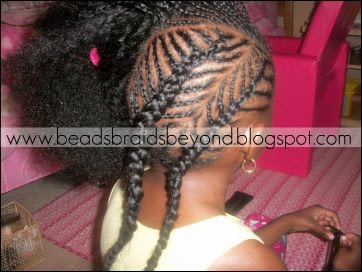
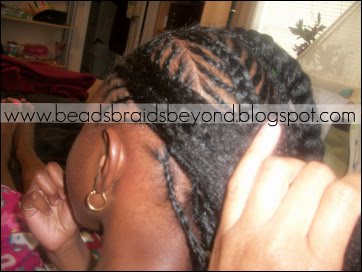
- I began to braid the side section. Once again I separated the section into 2 parts. I made the first conrnrow in that section in the middle (kind of at a point). The part that I made is behind this particular braid. I began braiding one side after I secured the other side with an ouchless band. I continued making small parts in her hair until I was done with that section. I did the same thing with the other part of that section.
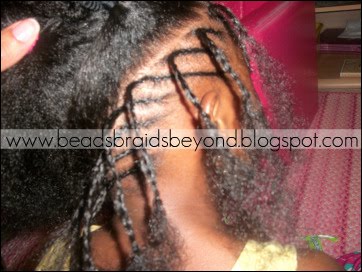
- While I was braiding her hair, I did not braid all the way down. I did braid too much of the hair in some sections so I had to undo them. I did not want the hair braided all the way down. I went back and made sure that the braids were loose so that I could cornrow the braids together.
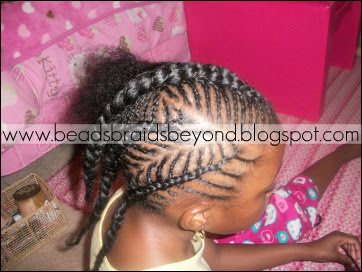
- Next, I began on one of the back sections. I continued with the same steps (separating the hair into 2 section, securing one side, and braiding towards the part). I did the same on the other side until I was done. I undid any braids that needed it and I cornrowed the braids together.
- Now I was ready to cornrow the top section. Once again I undid any braids that needed it and cornrowed both sides together.
- I started the other back section and followed the same steps.
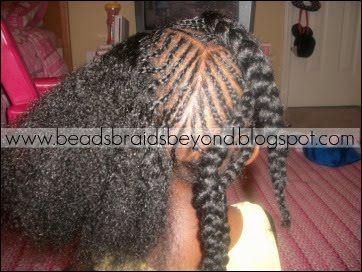
- I started my final section – the section on the side. I followed the same steps as previously stated until I was done.
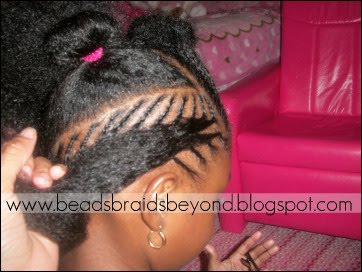
- I gathered each braid together and secured them with a black ouchless band. I wrapped the hair into a ball/bun and secured it with another black ouchless band.
- I added a pink flower to dress it up a bit.


You have read this articlecornrows /
fishbone
with the title Step-by-Step Fish Bone Cornrow Tutorial. You can bookmark this page URL http://twisthairstyles.blogspot.com/2010/07/step-by-step-fish-bone-cornrow-tutorial.html. Thanks!
Write by:
Unknown - Monday, July 5, 2010


.jpg)

Comments "Step-by-Step Fish Bone Cornrow Tutorial"
Post a Comment