As you may have read in this post I needed a style that would hold up well in the water. A has been swimming a lot and her two strand twists did not last.
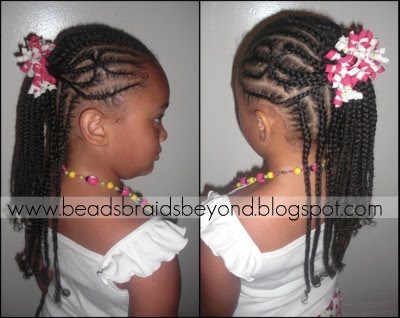
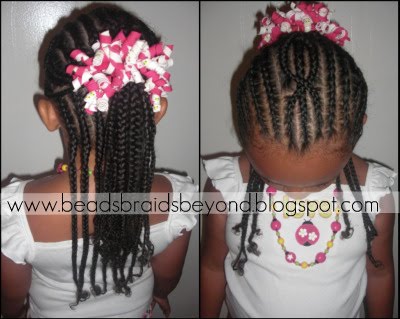
I decided to cornrow A's hair this week in two layers. I added some criss cross cornrows in so it wouldn't be too plain, pulled it half back and added some Gymboree korker bows. I'm pretty sure this style will last at least one week but hopefully it lasts longer than that. I will keep you all posted. Of course I used my new favorite styling products from Bee Mine. This style took about 2.5 hours total.
If you do not know how to cornrow, clickhere!
Instructions:
- I banded A's freshly washed hair in four sections the night before using ouchless ponytail holders and Bee Mine Luscious Moisturizer
- In the morning I took the bands out and finger detangled her hair a little bit, I then parted her hair from the back of the ear all the way to the other ear. I tied off the back section/bottom layer and got started on the top.
- On the top section of her hair I started by her right ear parting one slightly slanted section of hair. I applied Bee Mine Curly Butter to that section and cornrowed it.
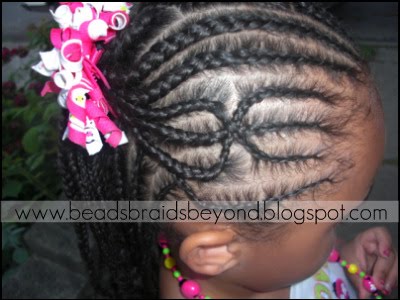
- I then parted out enough hair out for three cornrows (about 2 inches in width). I wanted to do criss cross cornrows, but I wanted to cross those cornrows over one straight back cornrow.
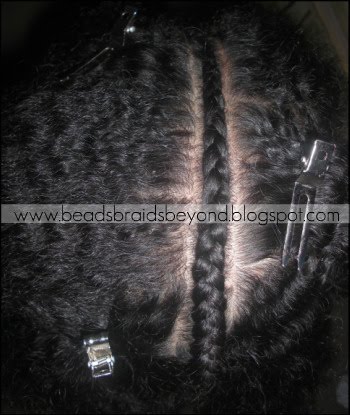
- I parted three sections from the 2 inch section I had. I then got the left section and right section out of my way by using slide in clips.
- I applied Bee Mine Curly Butter and did a simple straight back cornrow.
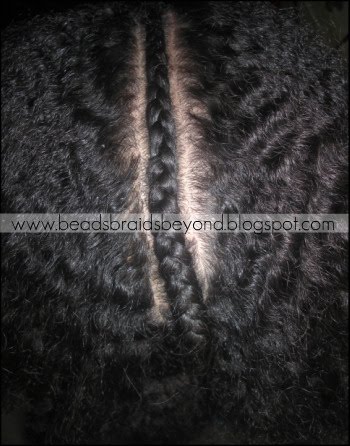
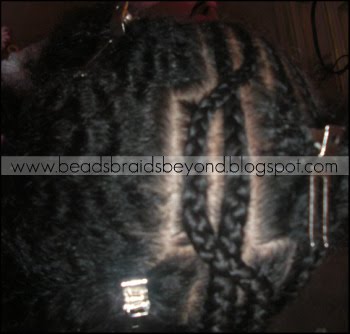
- After cornrowing that section I started to part the hair that I wanted to cross over the straight back cornrow. This picture shows I parted three horizonal lines in each section. I lined the lines up so they were even. I then used slide in clips to get the parts of hair I didn't need out of the way.
- I started from the top section that was on the right of my straight back cornrow, as I cornrowed that small section I, of course, ran out of hair so I did a regular underhand braid until I met the middle section of hair that was on the left side of the straight back cornrow. I then began picking up hair and adding it in to my braid to begin the cornrowing process over. After I ran out of hair, I once again started doing a regular underhand braid until I met the last section of hair that was in the right cornrow. Basically, start from top right section, cross over to left middle section, then cross back over to the last right section.
- I repeated the process on the other side.
- I continued the entire cornrowing process on the top layer of her hair. As stated, I started with one slanted cornrow, then did the criss cross cornrows over the straight back cornrow, then I did two straight back cornrows, then the criss cross cornrows over the straight back cornrow, repeated until I had the same thing on the other side.
- After I was done with the top I tied it off and began the bottom layer. Simple straight back cornrows. I lined my cornrows up with my top cornrows so they were even and repeated all the way across until I was done!
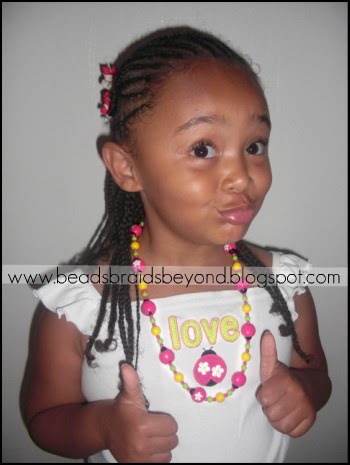
- I pulled the top layer up with an ouchless ponytail holder, added some korker bows and she was all done. You can add beads or barrettes if you would like.

"So, A, how do you like your new style?"
"Two thumbs up" :P
What's going on with your childs hair this week?
You have read this articlecriss cross cornrows
with the title Criss Cross Cornrow Layers. You can bookmark this page URL http://twisthairstyles.blogspot.com/2010/06/criss-cross-cornrow-layers.html. Thanks!
Write by:
Unknown - Tuesday, June 1, 2010


.jpg)
Comments "Criss Cross Cornrow Layers"
Post a Comment